Peek-a-BOO: A Guide to Using Hand-Drawn Digital Art for Your Projects
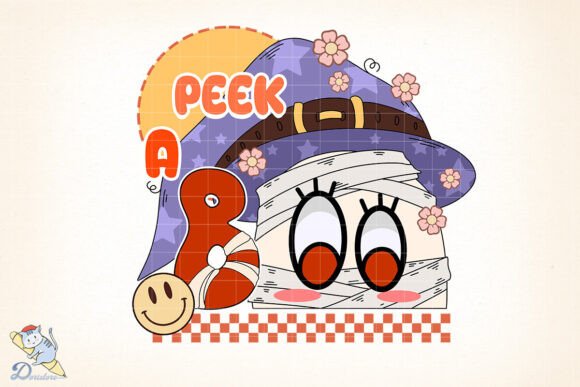
There is a distinct charm in artwork that feels human. The Peek-a-BOO design captures this perfectly, blending the organic flow of pen and ink with the soft, unpredictable nature of watercolour. This specific piece was created freehand, allowing the lines to dance across the page before being digitized to offer you a high-quality file ready for your creative ventures. Whether you are a small business owner looking to brand your products or a hobbyist wanting to create custom gifts, understanding how to utilize this digital asset correctly is the difference between a professional finish and a disappointing result.
Many creators dive into digital downloads without fully grasping the technical nuances of the files they receive. It is easy to assume that "high quality" means the image will look perfect on everything from a business card to a billboard. However, the reality of working with raster images like PNGs requires a bit more attention to detail. By taking a moment to understand what you are buying and how to apply it, you can avoid common pitfalls that waste time, money, and materials.
Understanding the Artistic Process Behind Peek-a-BOO
The Peek-a-BOO illustration is not a vector graphic generated by an algorithm. It starts as a physical drawing executed with pen and ink. This technique creates a freehand flowing line that possesses a texture and rhythm impossible to replicate with standard digital tools. Once the ink dries, watercolour brushes are applied sparingly to pick out highlight colours, adding depth and warmth without overwhelming the composition.
This hybrid approach—traditional art meets digital reproduction—is what makes the piece unique. However, because the original is hand-drawn, the lines have natural variations in thickness and opacity. When this is scanned and converted into a digital file, those imperfections become part of the character. For some projects, this is exactly what you want; for others, such as precise corporate branding requiring geometric perfection, it might require a different approach. Recognizing the medium helps you set realistic expectations for your final product.
Common Mistakes When Working with High-Resolution PNGs
One of the most frequent errors I see among beginners and even seasoned professionals is misunderstanding the relationship between resolution and print size. You will receive a file that is 4000×4000 pixels at 300 DPI. While these numbers sound impressive, they do not mean the image can be printed infinitely large without losing quality. If you stretch a 300 DPI image beyond its intended dimensions, the pixelation becomes visible, turning crisp ink lines into jagged blocks of colour.
Another significant oversight involves the assumption that a transparent background works automatically in every software environment. While the Peek-a-BOO file comes with a transparent background, some older printing software or basic photo editors may interpret transparency as white. This results in a white box appearing behind your beautiful watercolour highlights, ruining the aesthetic when placed on a dark shirt or coloured paper. Always verify how your specific software handles alpha channels before sending anything to print.
Furthermore, there is often confusion regarding file formats. Many customers expect cutting files (such as SVG or DXF) when purchasing digital art. It is crucial to remember that this product is a raster image intended for sublimation, waterslide transfers, or regular printing. There are no cutting files included. Attempting to use a PNG for a vinyl cutter or laser engraver that requires vector paths will lead to poor edge definition and potential machine errors. Understanding the distinction between raster and vector is essential for selecting the right tool for your job.
How Color Variations Impact Your Final Product
Color management is perhaps the most overlooked aspect of digital downloads. The statement that "colors may vary between devices and printers" is not a disclaimer to hide flaws; it is a fundamental truth of color science. The screen on your laptop uses light (RGB) to display the vibrant blues and warm browns of the watercolour highlights. Your printer, however, uses ink or dye (CMYK or sublimation dyes) to reproduce those colors.
If you rely solely on what you see on your monitor, you might be shocked when the physical print arrives looking duller or slightly shifted in hue. To mitigate this, always order a test print if you are producing items for a client or a large batch. Do not skip this step. A single test run on the exact material you plan to use—whether it is cotton fabric for sublimation or glossy paper for waterslide decals—will reveal the true color profile.
Additionally, the "freehand flowing line" of the ink drawing can sometimes appear darker or lighter depending on the density of the paper or fabric. On a dark garment, the watercolour highlights might need a white underbase to pop, whereas on white paper, they will appear naturally. Planning for these variables ensures your presentation remains consistent and professional.
Practical Steps for a Successful Download and Print
To get the best results from the Peek-a-BOO digital file, follow these practical guidelines before you begin your project:
- Verify Your Software Compatibility: Ensure your design software supports PNG files with transparency. Programs like Adobe Photoshop, Illustrator, Canva, and specialized sublimation software handle these well. Avoid using basic paint programs that might flatten the background.
- Calculate Your Print Size: With a resolution of 4000×4000 pixels at 300 DPI, the maximum high-quality print size is approximately 13.3 inches by 13.3 inches. If you need a larger format, consider tiling the image or accepting a lower DPI for very large banners, knowing that fine details may soften.
- Check the Zip File Immediately: Upon downloading the zipped folder, extract the files and open them on your computer to ensure the download completed successfully. Sometimes internet interruptions corrupt files, leaving you with incomplete data before you even start designing.
- Test Your Printer Settings: Before committing to expensive sublimation blanks or waterslide decal paper, run a test on standard printer paper. Check the alignment, color saturation, and whether the transparent areas remain clear.
Evaluating the Right Use Cases for This Artwork
The versatility of the Peek-a-BOO design lies in its application. Because it is a high-resolution PNG, it is ideal for sublimation onto mugs, tumblers, and polyester fabrics. The watercolour elements blend beautifully with the gradients possible in sublimation printing. It is also excellent for waterslide transfers, which allow you to apply the design to three-dimensional objects like glassware or ceramics with a smooth, painted look.
However, if your goal is to create a sticker with a die-cut edge that follows the contour of the ink lines, this file is not the correct choice. Since there are no cutting files included, you would have to manually trace the image in vector software, which defeats the purpose of an instant download. In such cases, it is better to purchase a design specifically marketed as a vector cut file. Being clear about your end goal prevents the frustration of buying a product that doesn't fit your workflow.
Ultimately, the value of this digital asset comes from how well you integrate it into your creative process. By respecting the limitations of the file format, accounting for color shifts, and choosing the right printing method, you can transform a simple digital download into a stunning, tangible product. Take the time to prepare properly, and your Peek-a-BOO designs will stand out for all the right reasons.